JETI model / duplex DC-24 II

Since the 30th anniversary of JETI in Benesov, CZ in September 2023, I have been the proud owner of the new JETI DC-24 Generation II. I have flown the transmitter for over half a year now and played with it a lot. I would now like to share my experience here and justify it accordingly.

What I particularly like is that it´s not a completely reinvented new transmitter, it is mainly based on the proved and successful JETI DC-24 with the addendum of a few new cool features. The design has remained simple and has only changed slightly due to the larger screen. To make the switch from “old to new DC-24” as easy as possible, JETI has chosen the dimensions of the new transmitter similar to DC-24 I so the transmitter fits in the old tray of DC-24/16/14.

The most noticeable innovation is the larger and, above all, super bright display, which can still be read perfectly even in direct sunlight. However, the transmitter’s battery life also suffers from the super bright display, which is noticeably shorter than that of the DC-24 Gen. I. Club colleagues and friends who have also switched to the DC-24II have one point to complain which is the shortened battery running time before need to recharge. Now you must charge again after roughly half of the battery running time of the old DC-24.

The icons and the design of the menu navigation have also changed slightly, making everything a little more logical and clearer. The individual receivers are shown at the top left corner of the screen, and it is shown whether and which receivers are connected.

Some software news are in progress and currently not available. The transmitter can already do this and will be available with a subsequent software update.

A helpful new feature is the ability to connect the transmitter to a smartphone. Another person has the real-time telemetry data from the flight on their cell phone and can check and monitor all values ​​directly.

Modern wireless headphones can now also be paired with the transmitter. A great solution to give the pilot and the caller each one headphone when practicing aero musical sequences. Or simply listen to the Vario comfortably on the slope.

In addition to all the technical news, the new, red anodized aluminum transmitter case is a real eye-catcher. Although it is only a transport case for the transmitter, it is still a proof that style and design play an important role at JETI model. As beautiful as the case is, the inscription (JETI, duplex…) will probably not last forever and it remains to be seen how quickly the beautiful suitcase will “wear out” during airport and transport use. As an option there is a transmitter case foam insert that neatly centers the transmitter in the transport case.

In my club there are now a few DC-24 IIs, all working great and the trend is towards more DC-24IIs or the soon coming DS-24II.

Summary of what has changed compared to the DC-24 Generation I:

  • USB-C charging port like all common tablets and smartphones
  • 900 mHz NG installed
  • Larger and brighter display therefore suitable for airfields even in bright sunlight
  • Bluetooth and Wi-Fi for future updates and pairing with smartphone or wireless headphones
  • iOS/Android APP for visualizing telemetry data on smartphone/tablet
  • Visually redesigned symbols for even clearer menu navigation
  • Battery runtime has become significantly shorter compared to the DC-24 Gen. 1
  • Beautiful red aluminum transport case

INFO: JETI recommends only using the included USB-C charger to charge the transmitter. And, for example, not to use an inexpensive USB-C charger from the set of a cheap electric toy.

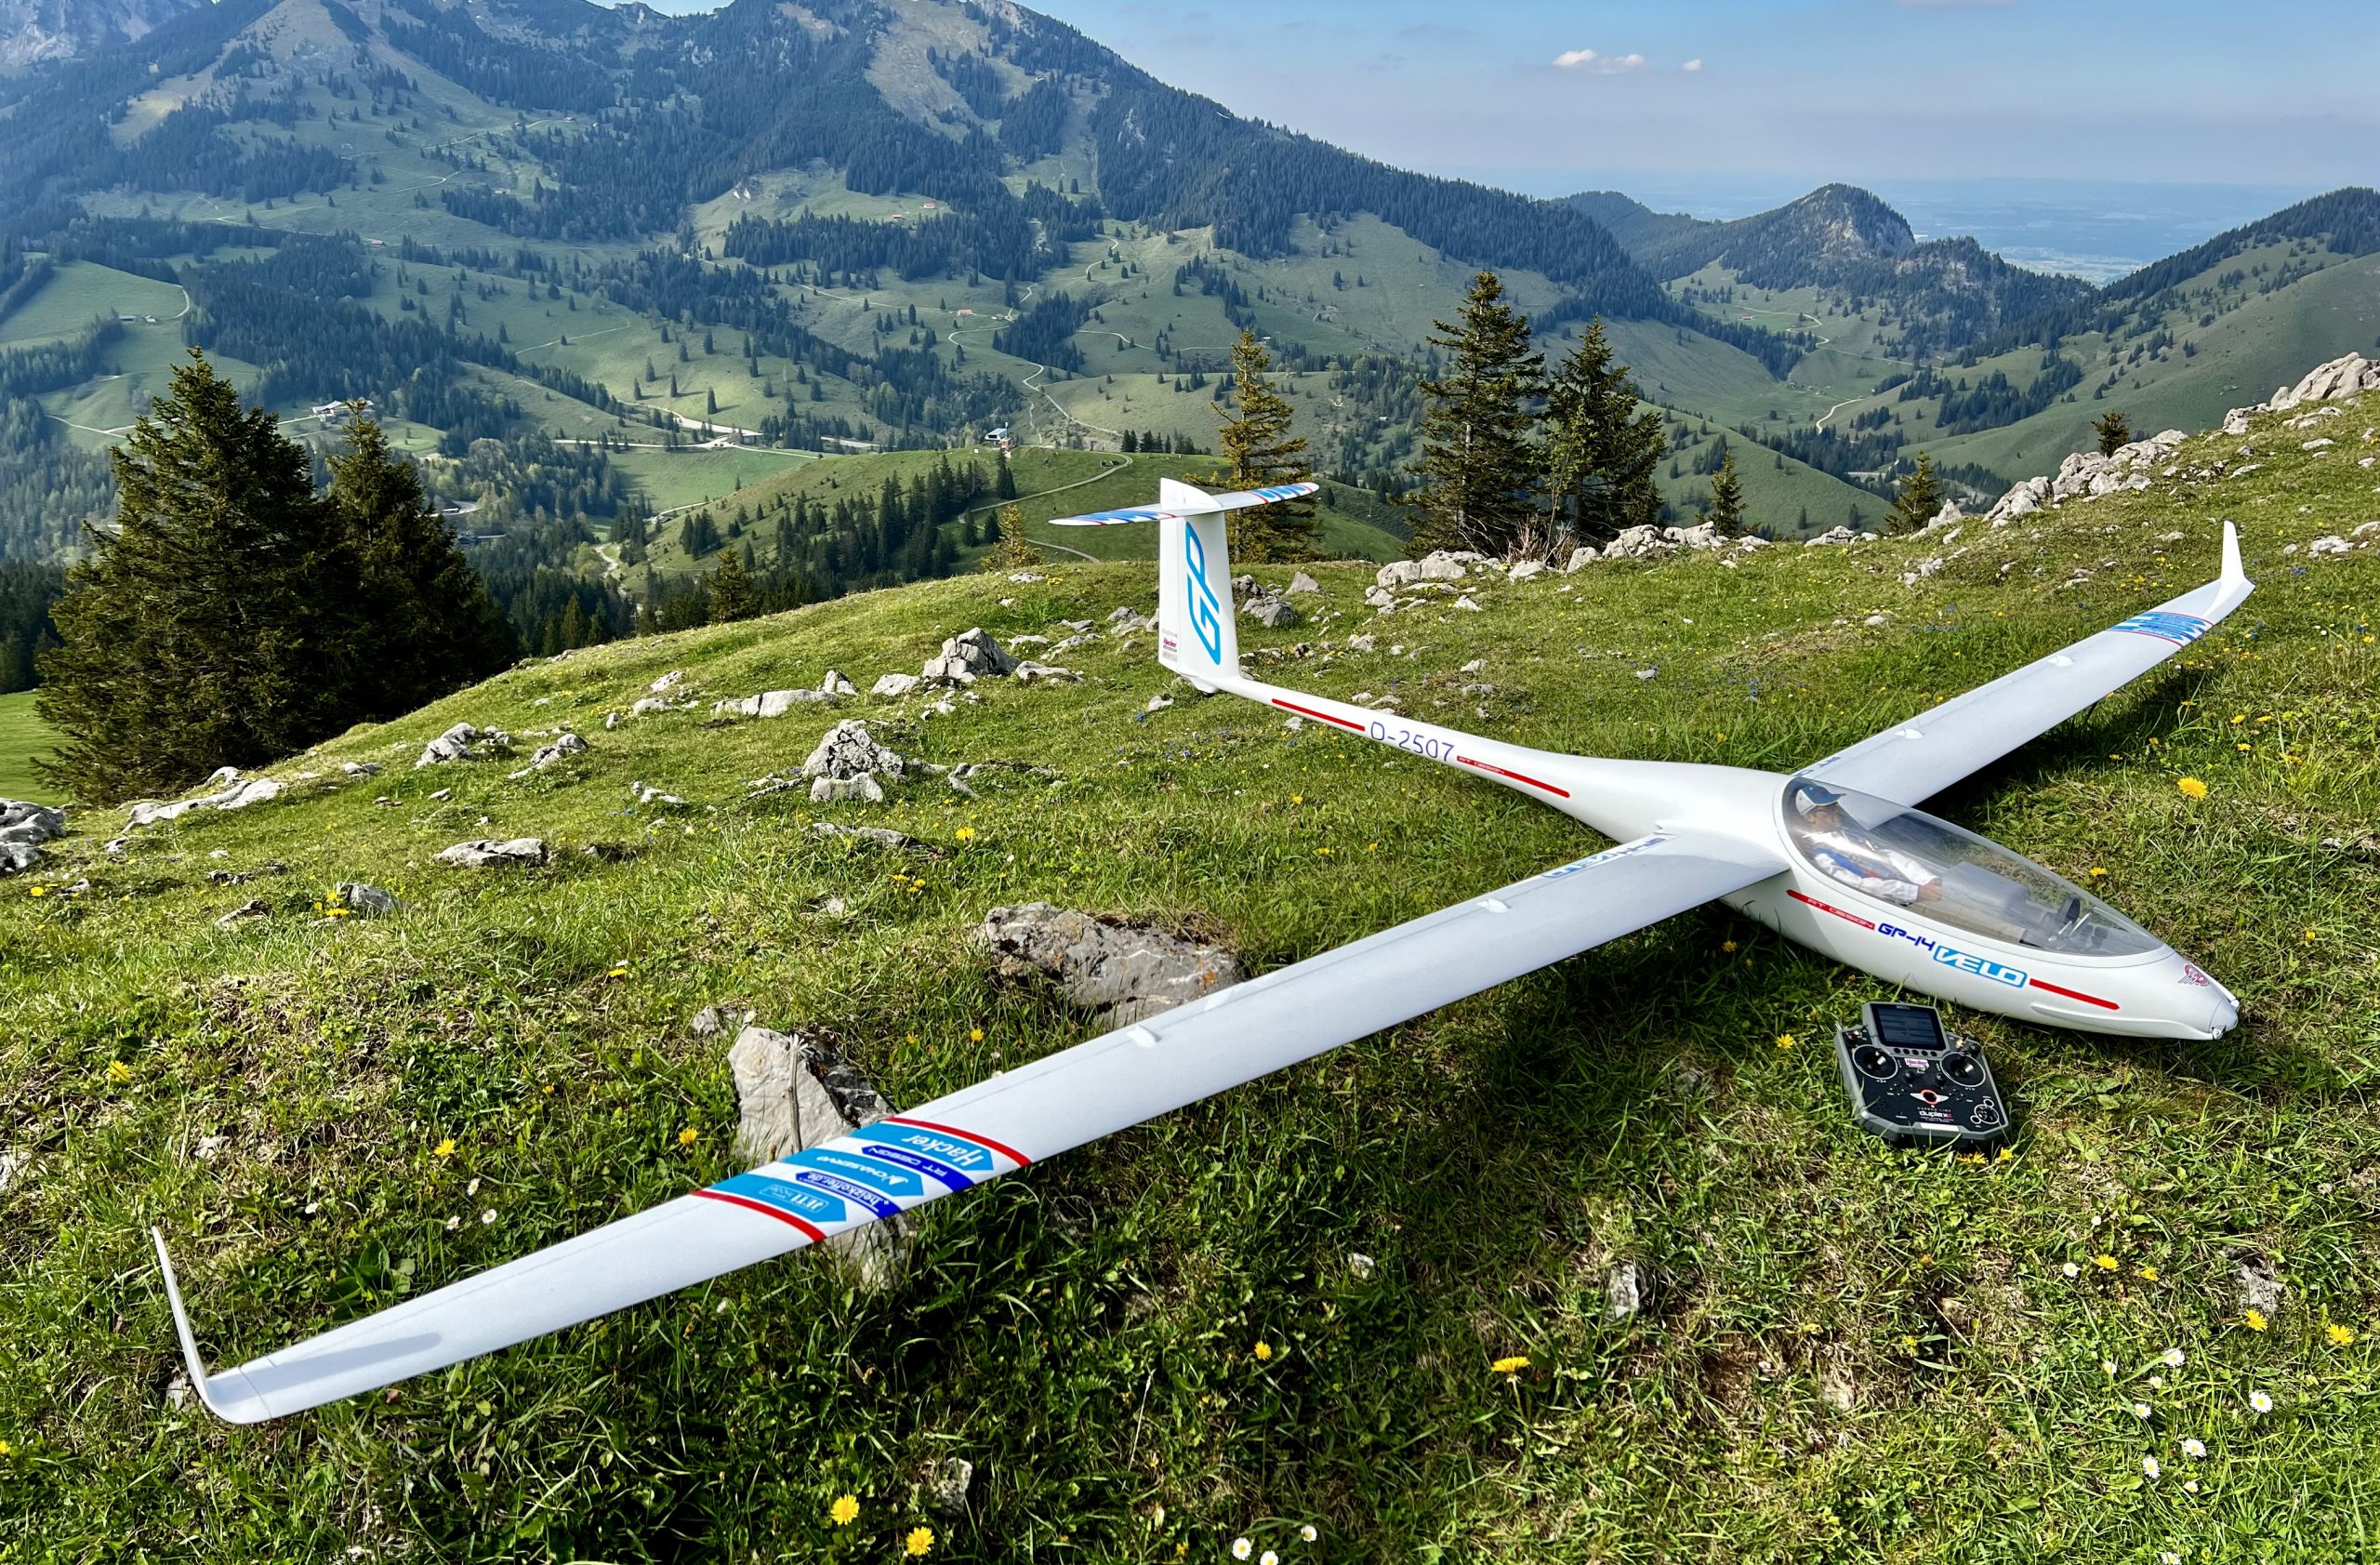
GP-14 VELO by Multiplex double carbon

I thought about writing a short construction report about this MULTIPLEX plane for a long time and finally decided to do so. Because the new GP-14 VELO by MULTIPLEX is significantly better than its reputation. In a german forum the aircraft and the construction are being trashed, which I personally cannot understand. I built the plane and I`m absolutely convinced by the quality and the flight performance. I think the development team at MPX did a great job with this model, and that’s why I’m sharing a few pictures of the building and nice flights in the mountains.

First of all, it is very commendable that there is a detailed, illustrated instruction manual available for the GP-14, which is a rarity these days. Various installation options are described, whether landing gear, FES or retract EDF, all information can be found in the instructions. The cockpit tub including panel is available as an option from Multiplex. Also a special carbon spinner and a white painted carbon prop is available. For this prop, the hacker service recommended a suitable engine for 6S setup, the A50-16S.

For the linkages in the wing, I didn’t use the standard linkages with Z-wire and fork head, but rather the extremely high-quality installation frames including rudder horns and pushrods from heizkoffer.de. It couldn’t be more playful, rigid and elegant!I still had a pilot in 1:3.5 from Tailored Pilots which fits perfectly into the GP-14 VELO. I drew the rudder pedals in CAD and simply printed them out of PLA and painted them. Thae same I did with the linkage and control horn covers on the wings, they are also printed from white PLA.The 5000 battery is located directly in front of the wing joiner and with the pilot in the cockpit, not a gram of ballast is necessary in the nose for the correct CG!The finish is entirely realized with plotted vinyl stickers.

The power unit by Hacker allows very easy hand launchs and in headwinds, two steps for takeoff were enough. The A50 offers enough power to climb a good 45° with a current consumption of approx. 70A. So with the 5000mAh battery allows 6-7 climbs per flight.

The GP-14 performs fantastically both in thermals and in aerobatics and the pulling power is also very good for a model of this weight and size. With the help of the ACL glider lights on the bottom of the wing, the model can be perfectly recognized or found even at high altitudes or when flying on a slope with a changing background.

All I can say about the GP-14 is: Well done MPX!

GeeBee R2 Restauration!

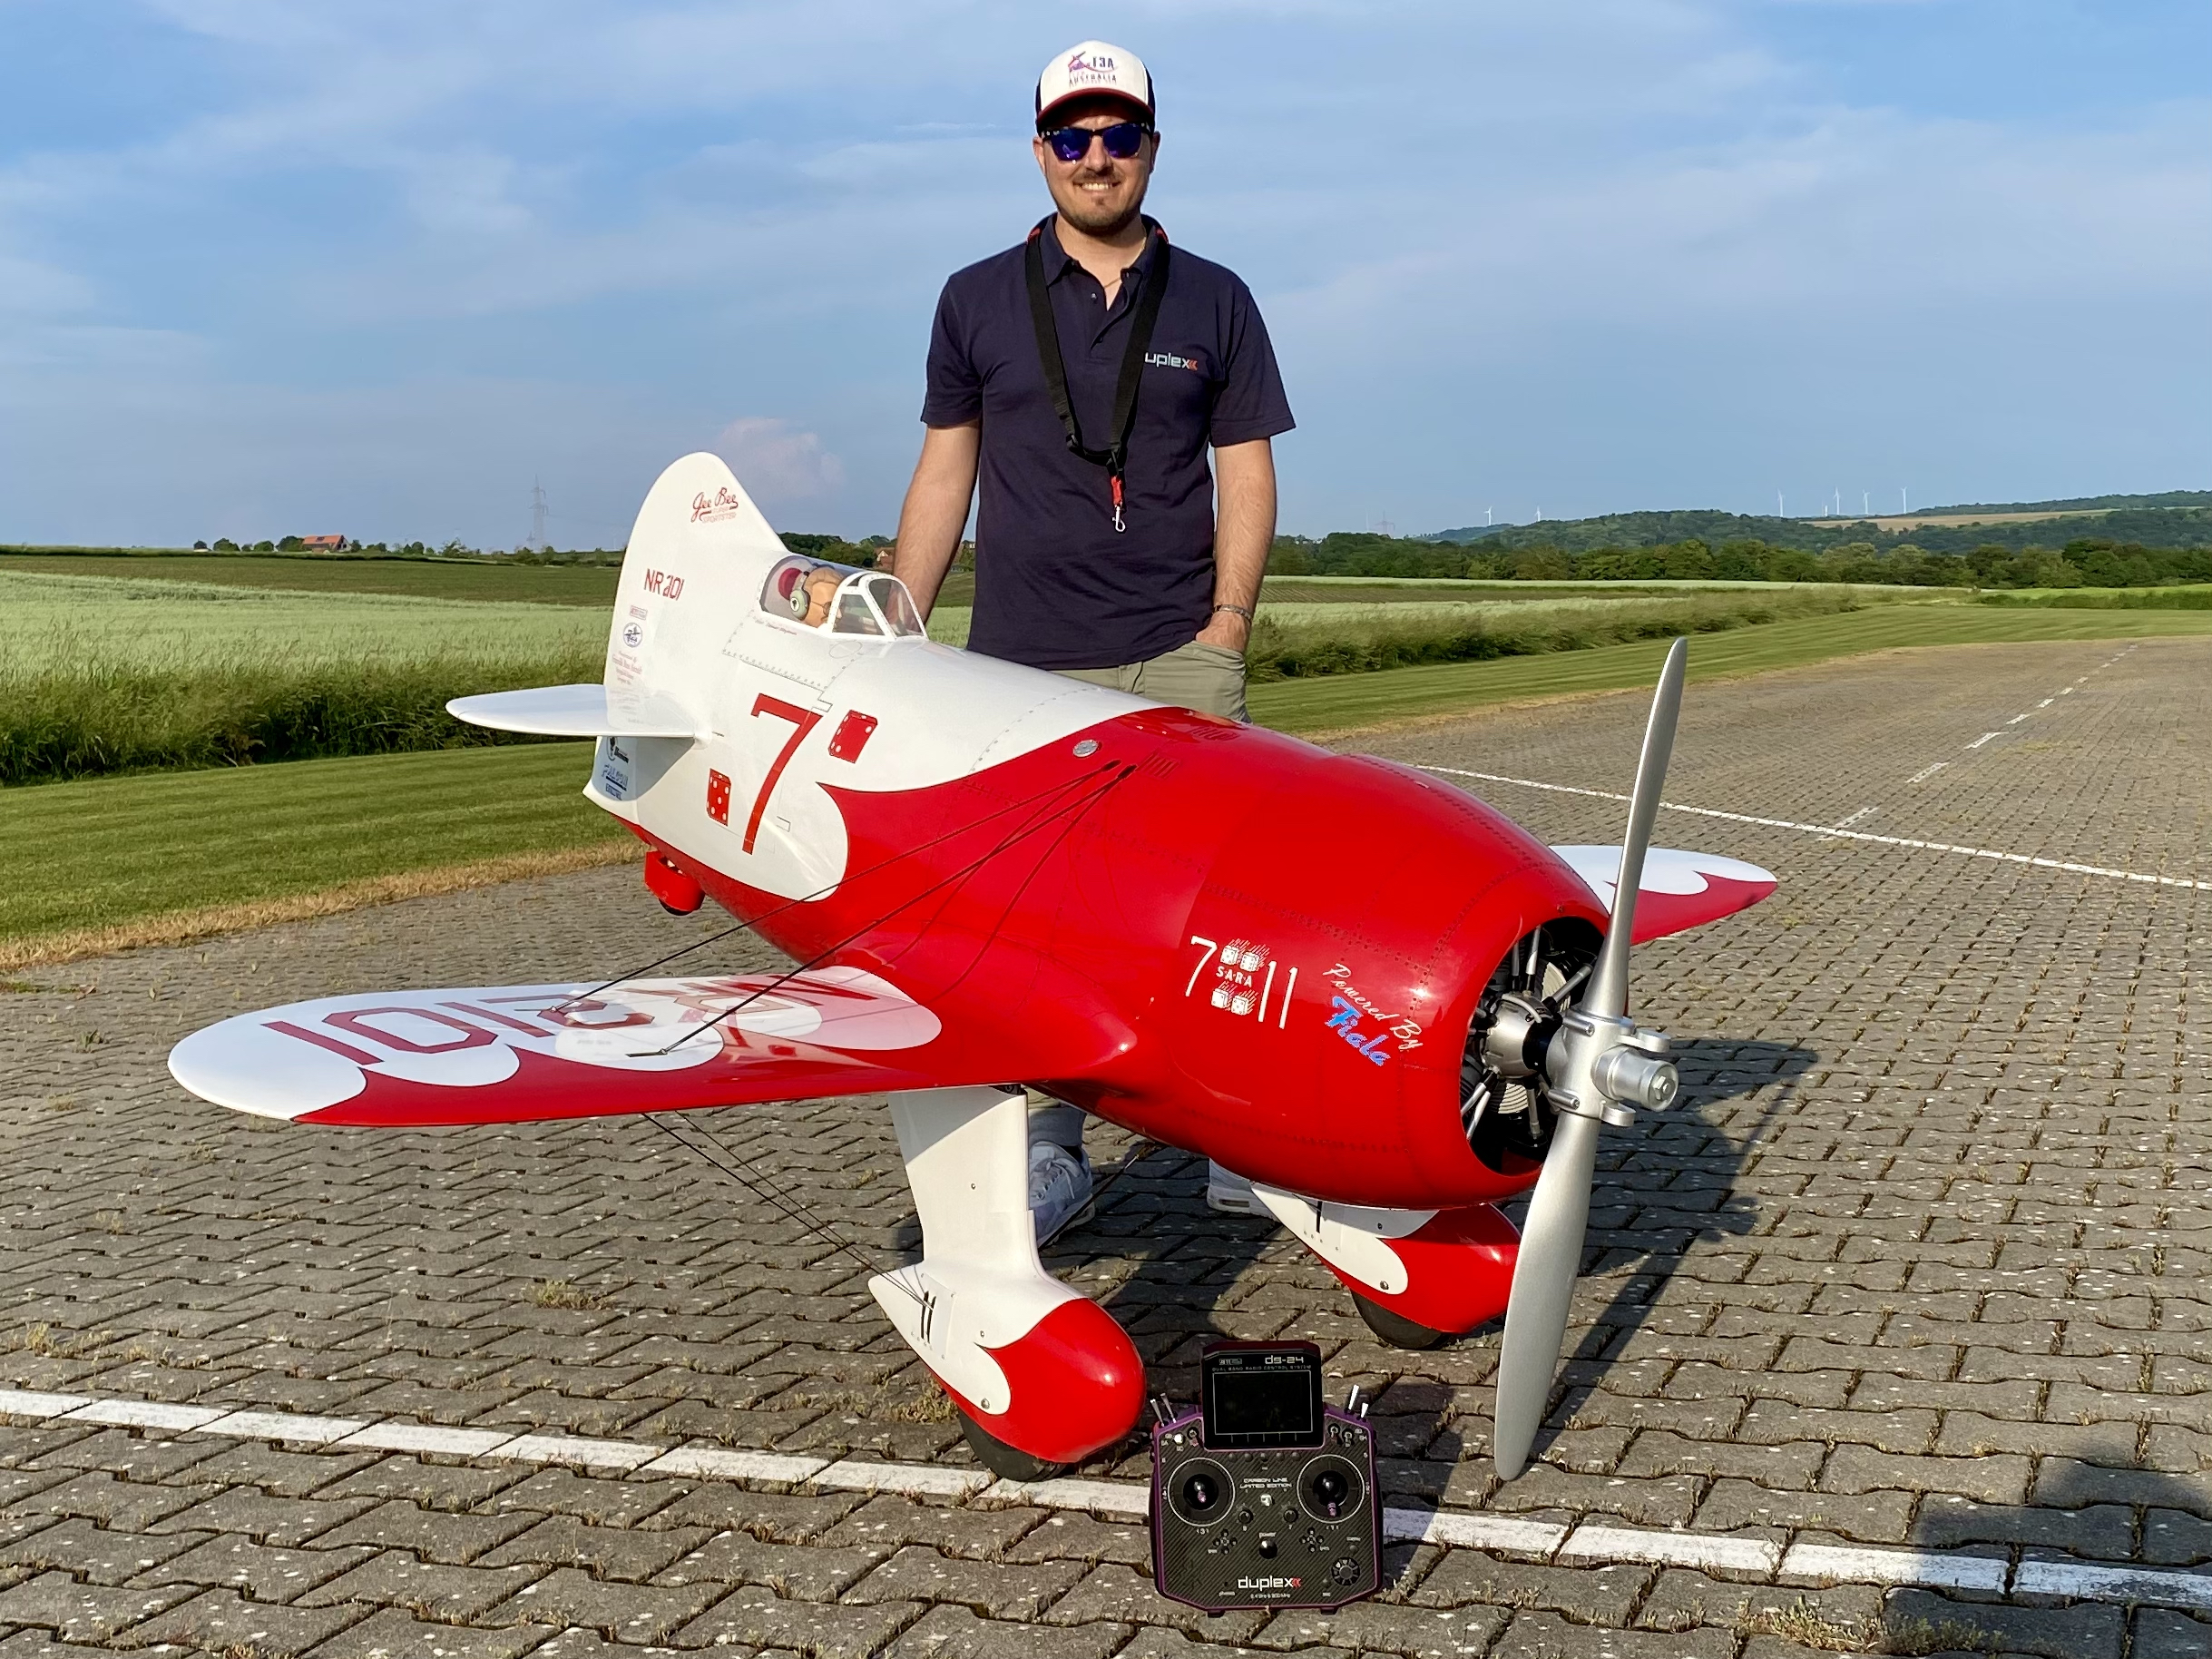
My passion for the GeeBee started at the age of 12 and has not changed since then. For a few years I flew an electric powered GeeBee equipped with a Hacker A200 and 2x 12S 5000mAh but sold it in 2019. Last year I had the chance to get another damaged R2 and decided to restore it and install a Fiala 250ccm 5-cylinder radial engine, the same engine I’ve been using in my Bücker for the past 2 years.
 The fuselage was damaged in different areas and it turned out to be much more work than expected. My procedure was as follows:

  • Opened the compressed areas with a cutter until the inner side of the sandwich. Removed the compressed and crumbled support foam.
  • Filled up the opened areas with thick epoxy and sanded it down
  • Put a layer of glass fabric above and sanded again
  • Puttied and sanded all
  • Fillered all fixed areas, sanded and reworked the panel lines with a fine rasp
  • Made rivets out of white glue
  • Repainted red
  • Slightly weathered with black oil color

 The effort was well worth and I am super happy with the result. I hope the model lasts long.

 When I bought the GeeBee I contacted FALCON to produce a scale prop in the correct size for the radial engine. And the result is a stunning 34×18 prop which fits and looks excellent. Even the measurements are almost correct compared to the full size.

 The equipment of the GeeBee is proven in my other models:  Hacker DITEX EL-3214 servos, JETI CB-220 with 2x RSat and RCSW. 2S Hacker ECO-X batteries, ClickConnect for the motor unit, EMCOTEC smokepump and 2 kevlar tanks by CM-Jets.

 In this model I used a gyro for the first time. The Cortex Pro by Bavarian Demon was my choice as it is the best system working with JETI model and can be set up directly from the transmitter, no computer needed. And it is connected straight between the 2x RSat and the Central Box. So easy!

« of 2 »

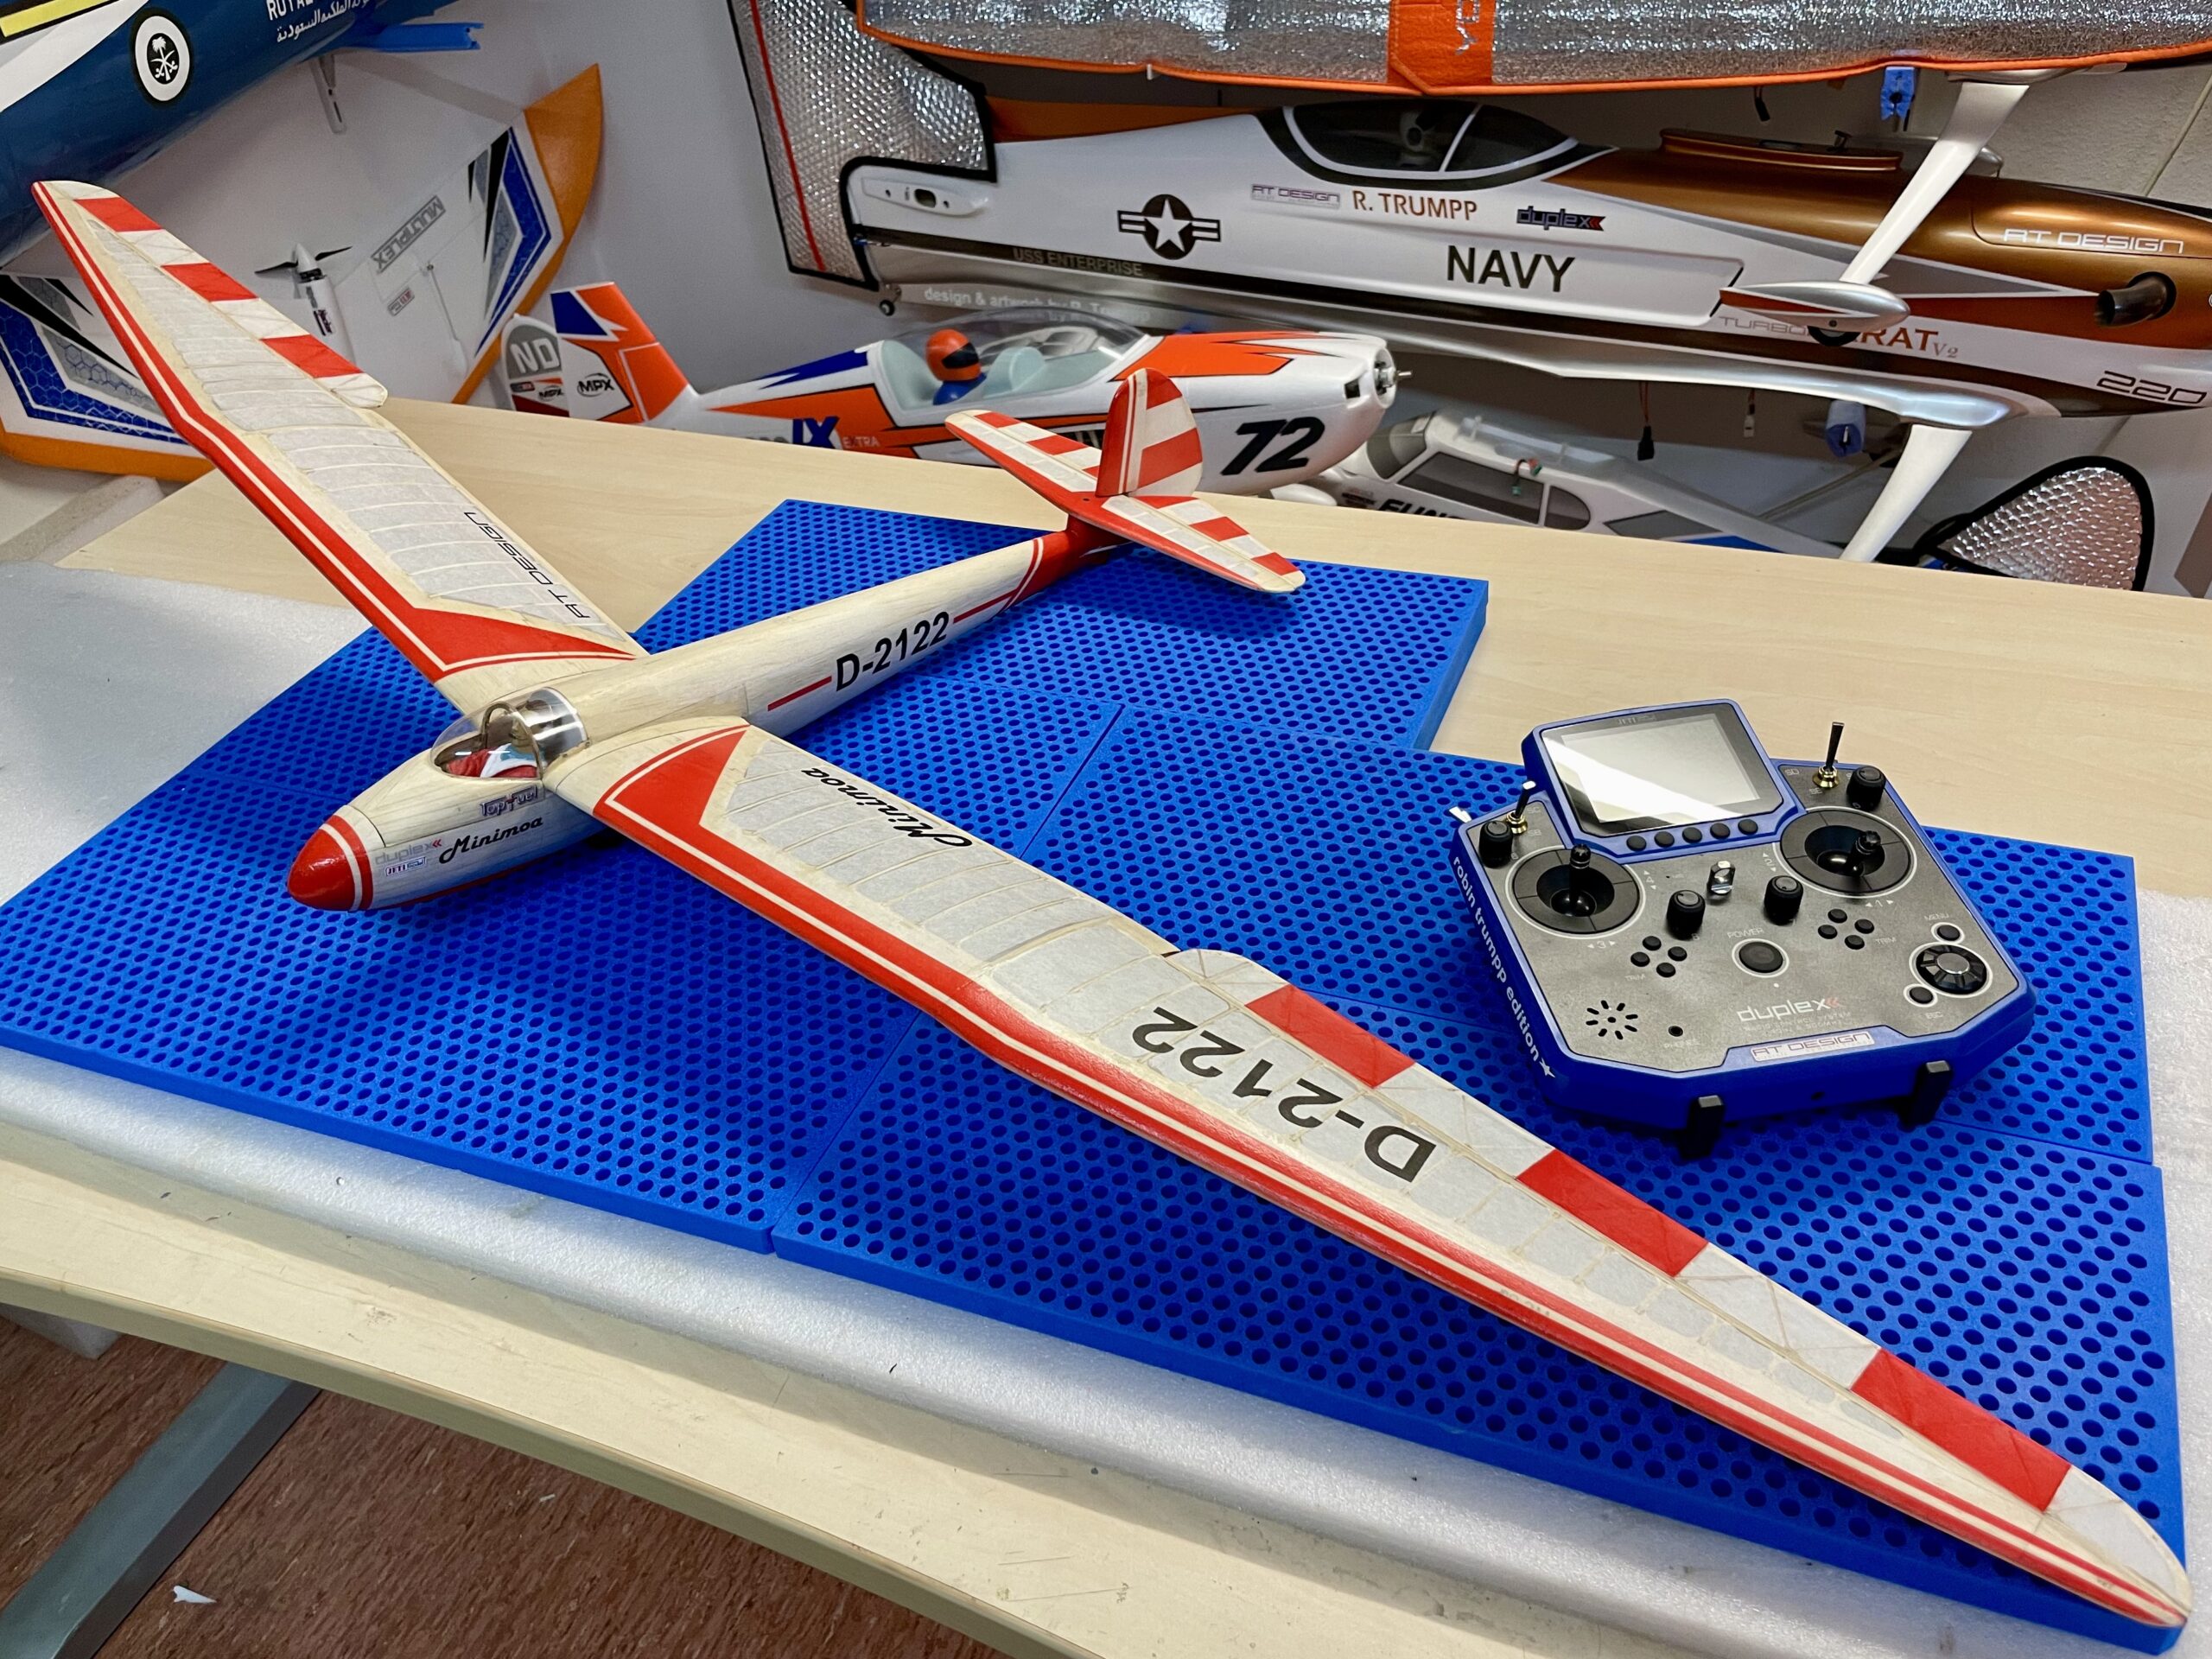
1:12 Minimoa by Tony Ray / Pichler

After my stressful 5th semester at studies I had the desire to build something out of Balsa again. At the exhibition in Friedrichshafen I saw the kits of mini vintage gliders from Tony Ray at the Pichler booth. Right after the event I ordered a kit of Minimoa.
With the support of my 3D printer and covered with japanese paper and Graupner Spannfix  a really nice little vintage glider was born.
Check the pictures and see the progress of my little Minimoa.
Spannweite: 1422 mm
Länge: 625 mm
Gewicht: 330g
« of 2 »

BVM-Jets Ultra BANDIT

HAPPY NEW YEAR!!! 

After a few weeks without any new report here I decided to drop a few lines about the UltraBANDIT proejct from last summer…

In 2018 BVM-Jets announced a jubilee version of their legendary UltraBANDIT which was a “must have” for my father. It took almost 2 years until he started to build the plane in January last year.
State of the art equipment had to be installed: brandnew JetCat P250, Hacker / Ditex Servos, JETI model CentralBox-220 with 2x 2,4Ghz + 900mHz Backup-RX, Electron retractsystem and a custom smoke tank from CM-Jets.

While my father was building the jubilee UltraBANDIT, I completely reworked the older UltraBandit. It got also an electric landing gear, stronger “Low Voltage” Hitec flap servos and a JETI model CentralBox-400 with 2x 2,4Ghz + 900mHz Backup-RX. The CB-400 is required due to the older Futaba LV-servos which need only 5,9V.
Overall it was much more work than expected, as the electric gear has completely different design and other measurements. That´s why I needed to remove some of the old gear mounts and let my friend cut new carbon flex-plates for main- and nosegear – Thanks Manuel!
In July we finally made both maidenflights.

Conclusion: The “old” UltraBANDIT is still in a league of its own. The quality, the details and the extremely balanced flying is in my opinion still unrivaled.

All the work paid off, both airplanes fly excellent! Especially the JetCat P250 with its fast start, fast throttle response and the support of turbine telemetry make it a good progress in turbine flying.
The knowhow in this 15 year old design is still in the pole-position!


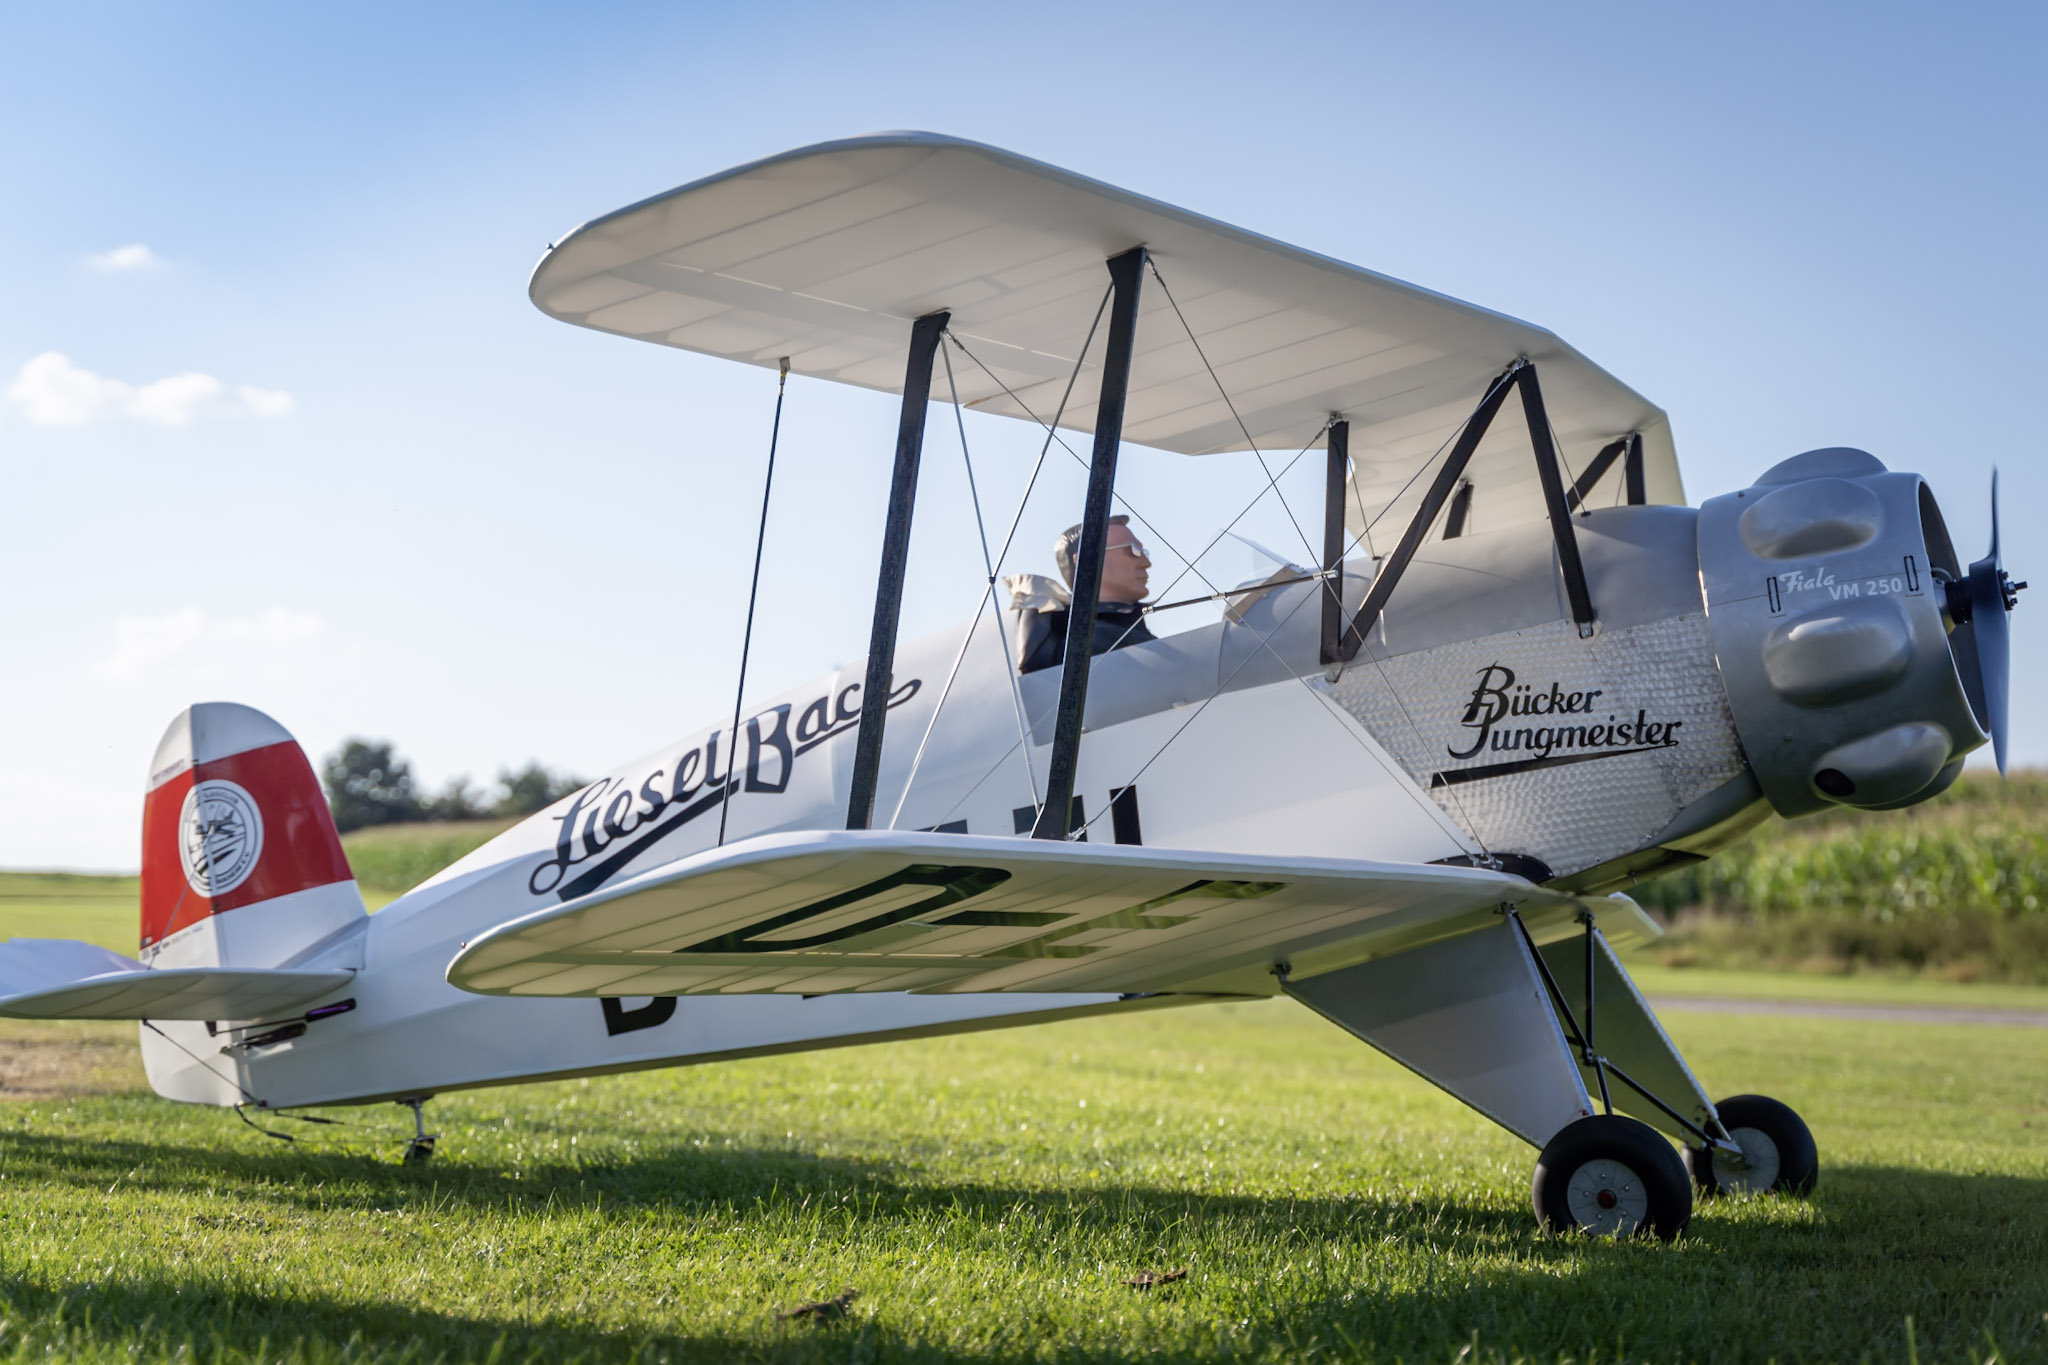
50% Bücker 133 Jungmeister

SPECIFICATION:
wingspan: 3,30 m
length: 3,00 m
height: ca. 1,2 m
weight: 24,6 kg

EQUIPMENT:
Fiala / Valach VM-250 R5
FALON beechwood vintage style 32×18
Hacker / Ditex EL-3214S
JETI duplex CB-220
2x JETI duplex RSat 2
1x JETI duplex RSat 900mHz
Hacker / TopFuel 3x 2400 2S
EMCOTEC premium wires

VIDEO (J. Benz):

PICTURES (J. Benz):

KARAT biplane build report

I am very happy to see one of the best builders we have in F3A building on of my planes and giving aeromodellers around the world the chance to follow each step he makes.
Isaac Najary from Israel writing in famous american RC-UNIVERSE forum a detailed report of his KARAT biplane building.

CLICK HERE FOR RC-UNIVERSE build report RT DESIGN KARAT biplane

Thank you very much, Izzic! I am very excited to see the result 😉

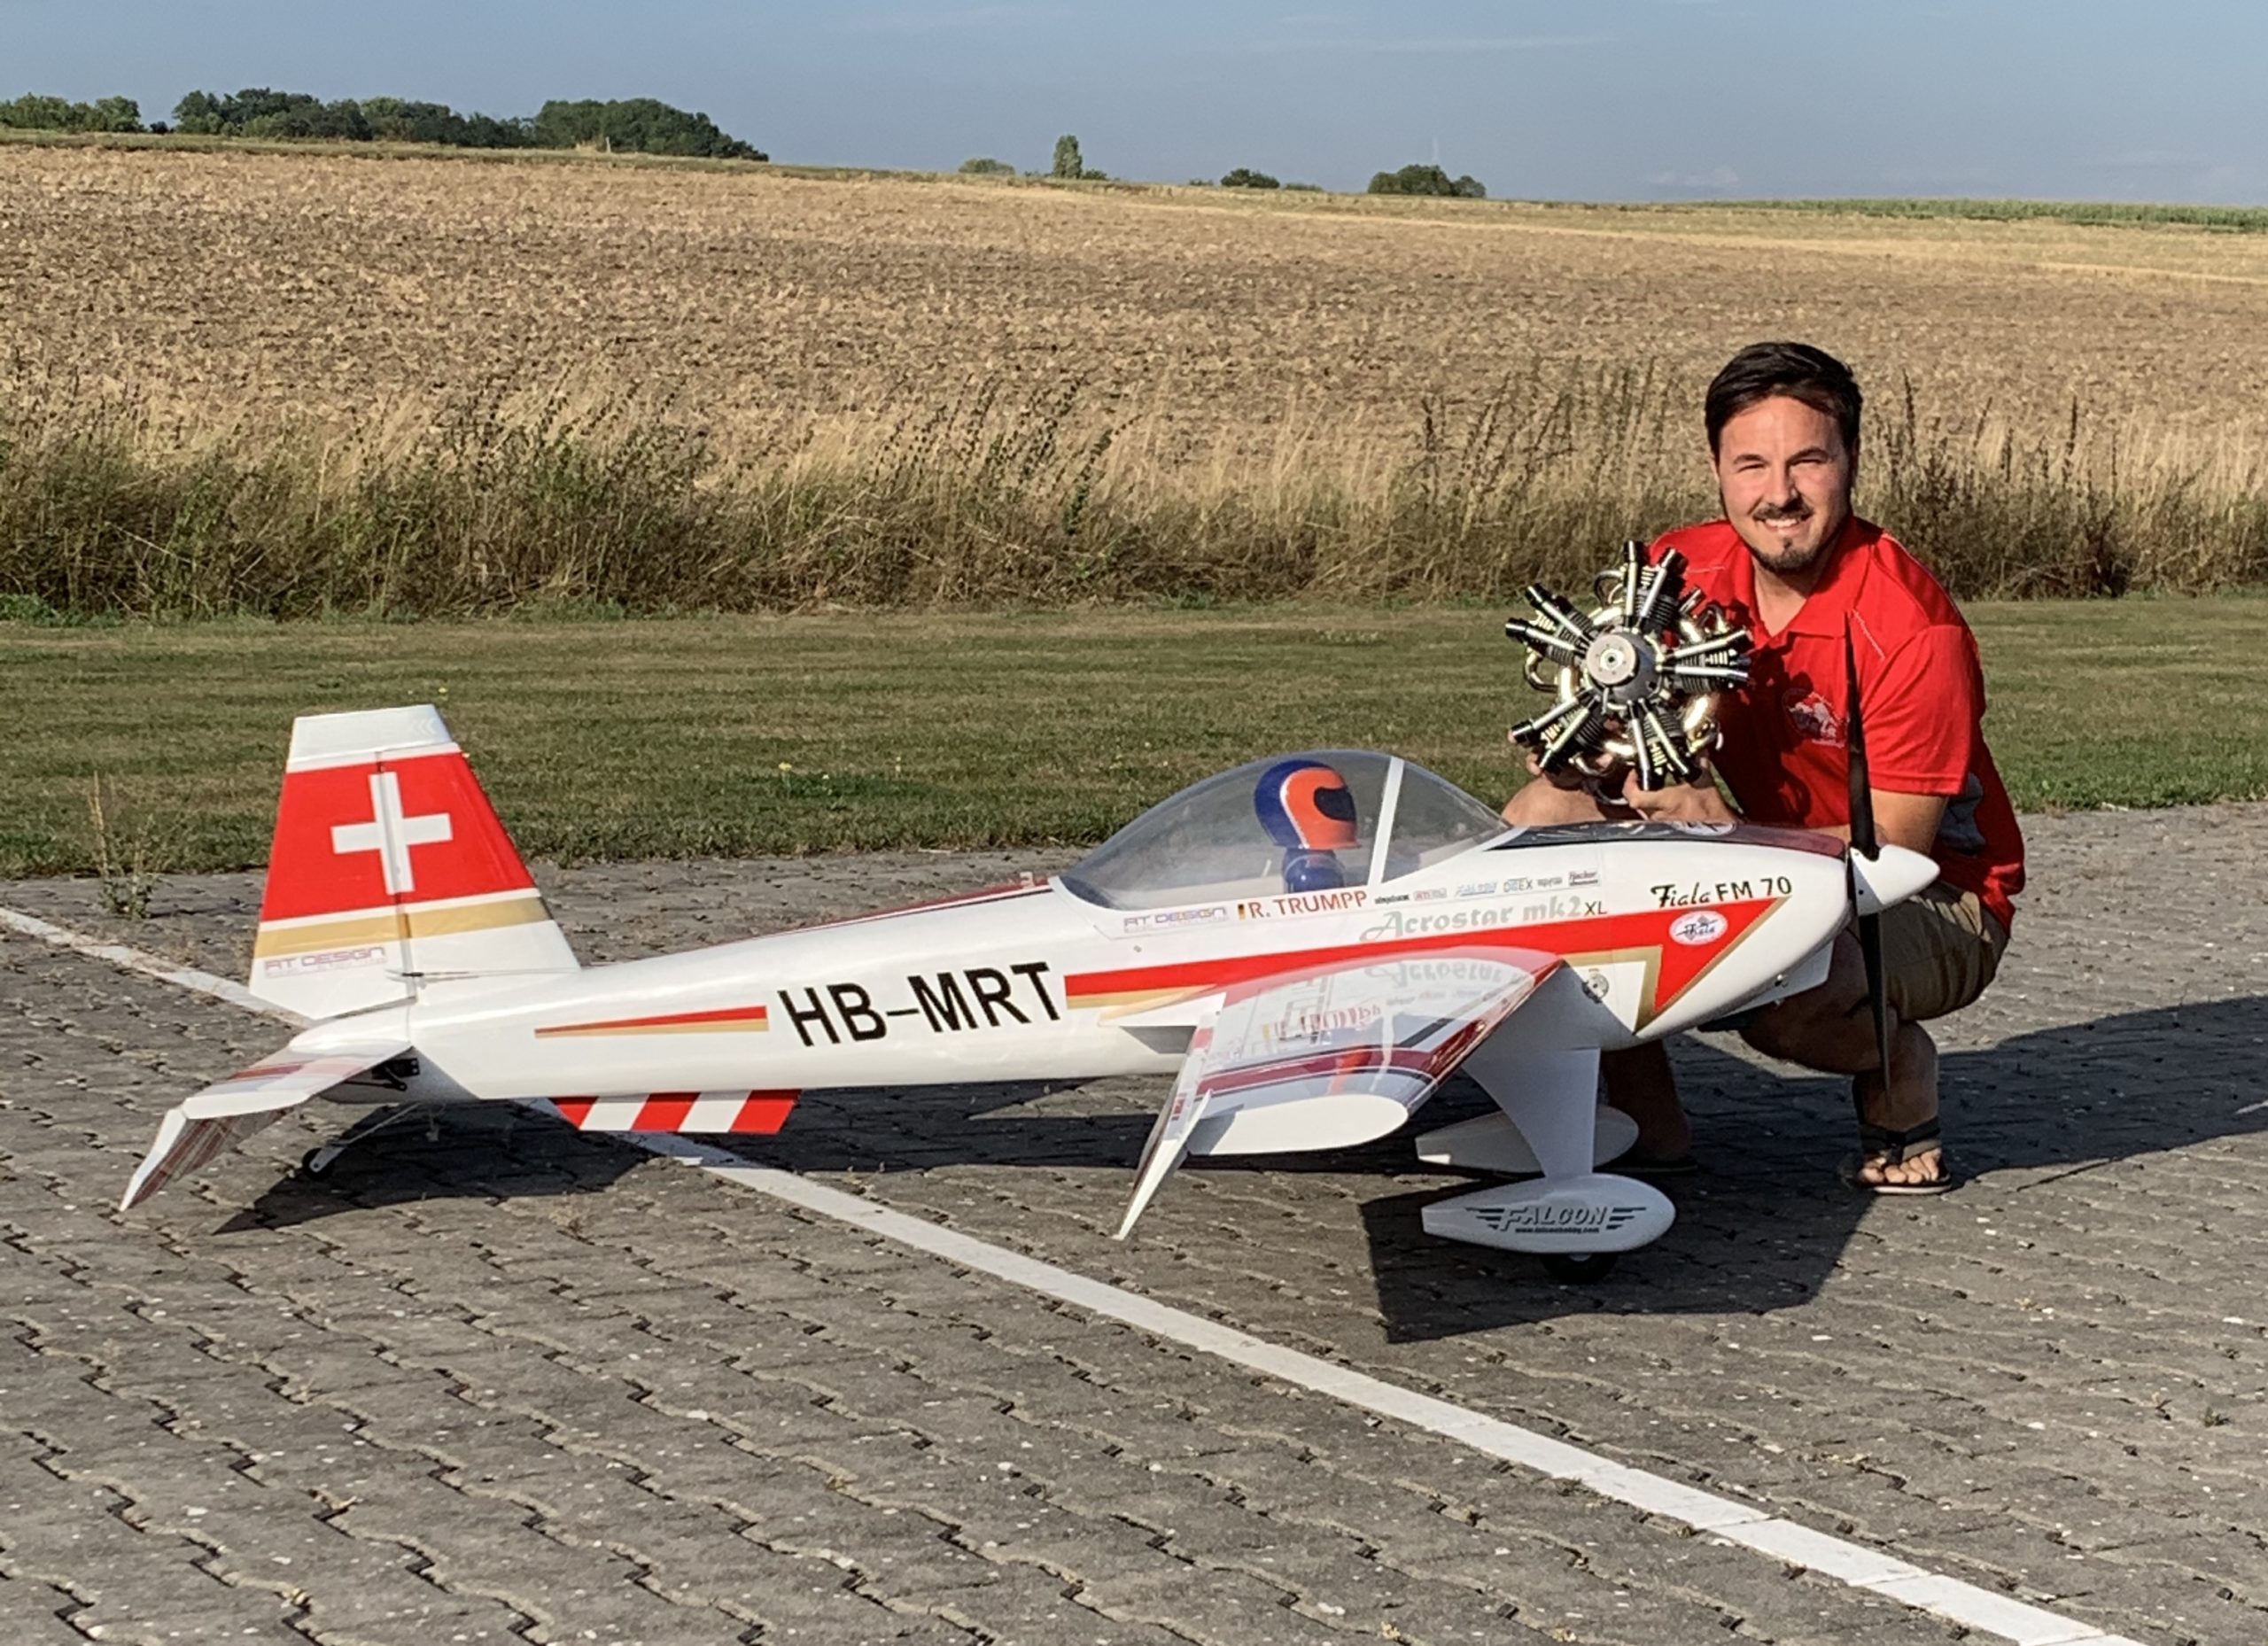
Acrostar mk2 XL repair

Unfortunately a clubmember crashed my Acrostar and damaged the gear, the gear frame, the wing support, the landing gear covers wheelpants and cowling.
I thought about building a completely new Acrostar or just fix the fuselage.
I decided to do the second option and took some pictures during this process…


My message with this post: You don´t have to throw it away immediately 😉

Acrostar mk2 XL UPDATE!!!

The delivery of series product of Acrostar XL has started and here are some additional tipps / information.

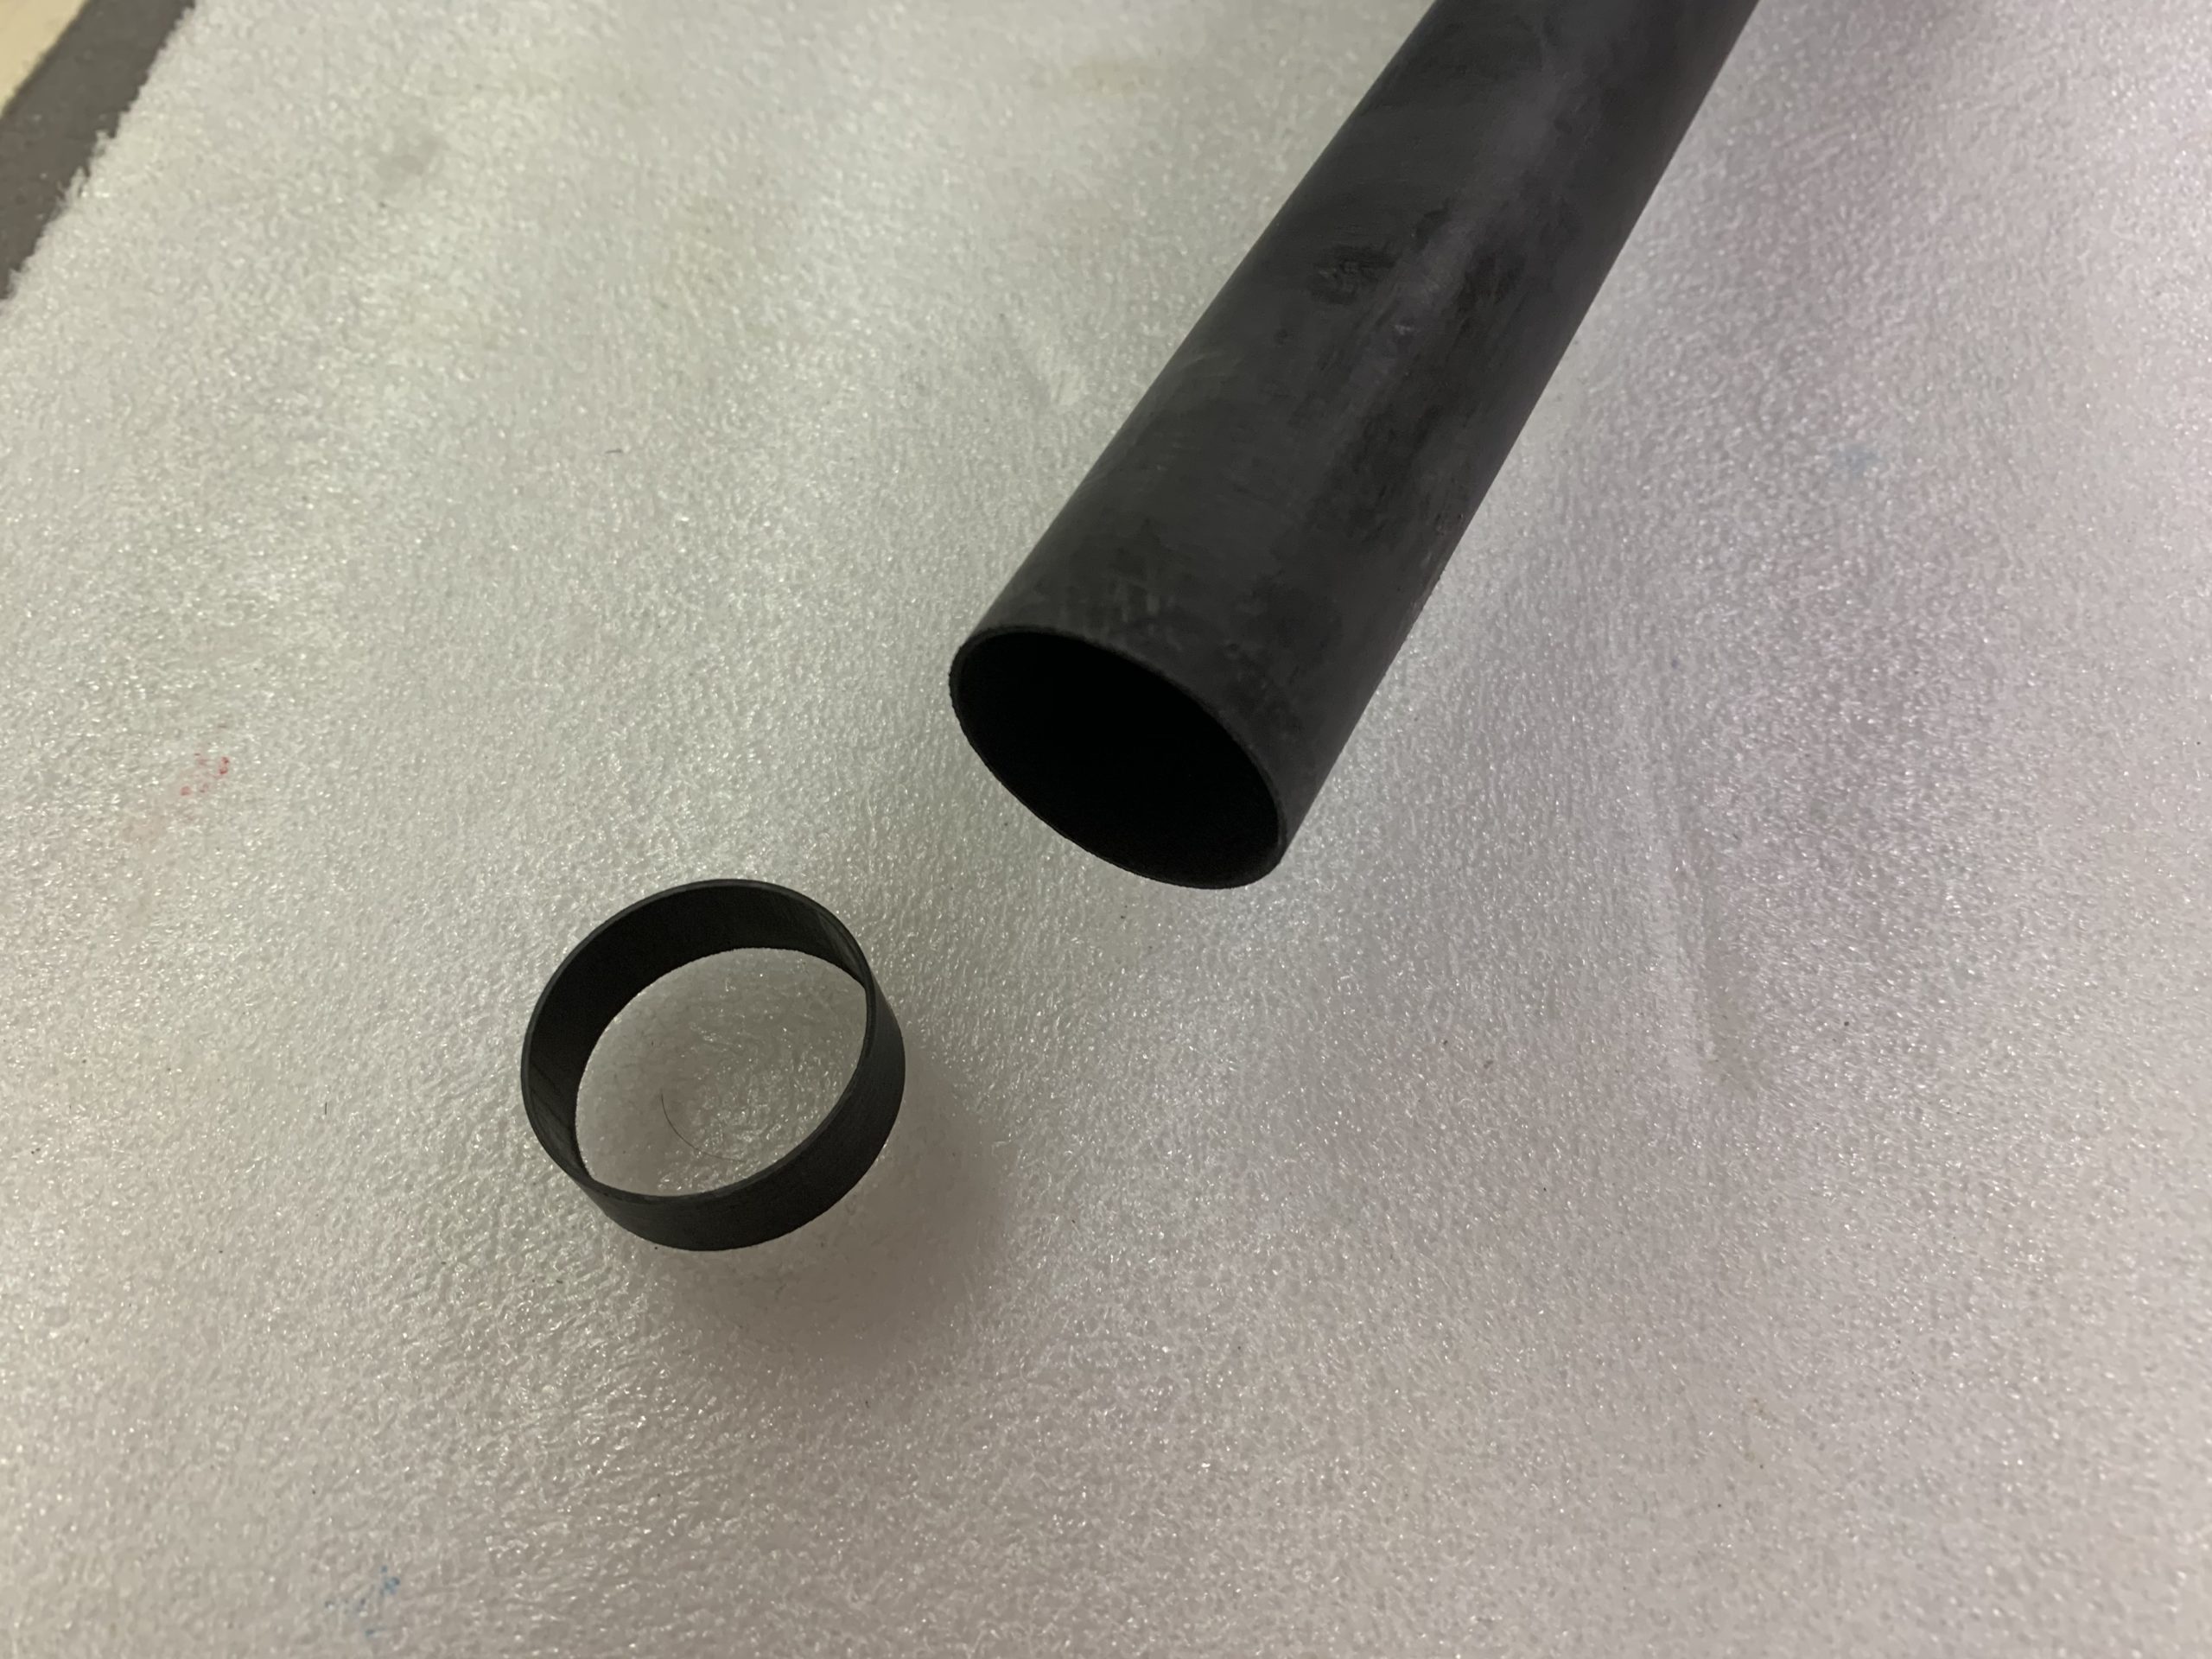
The wing tube which is included in the kit, was changed due to my wish. More specifically the wall thickness has been enlarged to get a stronger tube. The new tube is also used by the manufacturer for another airplane. So It could be possible that you need to cut the tube around 10mm.

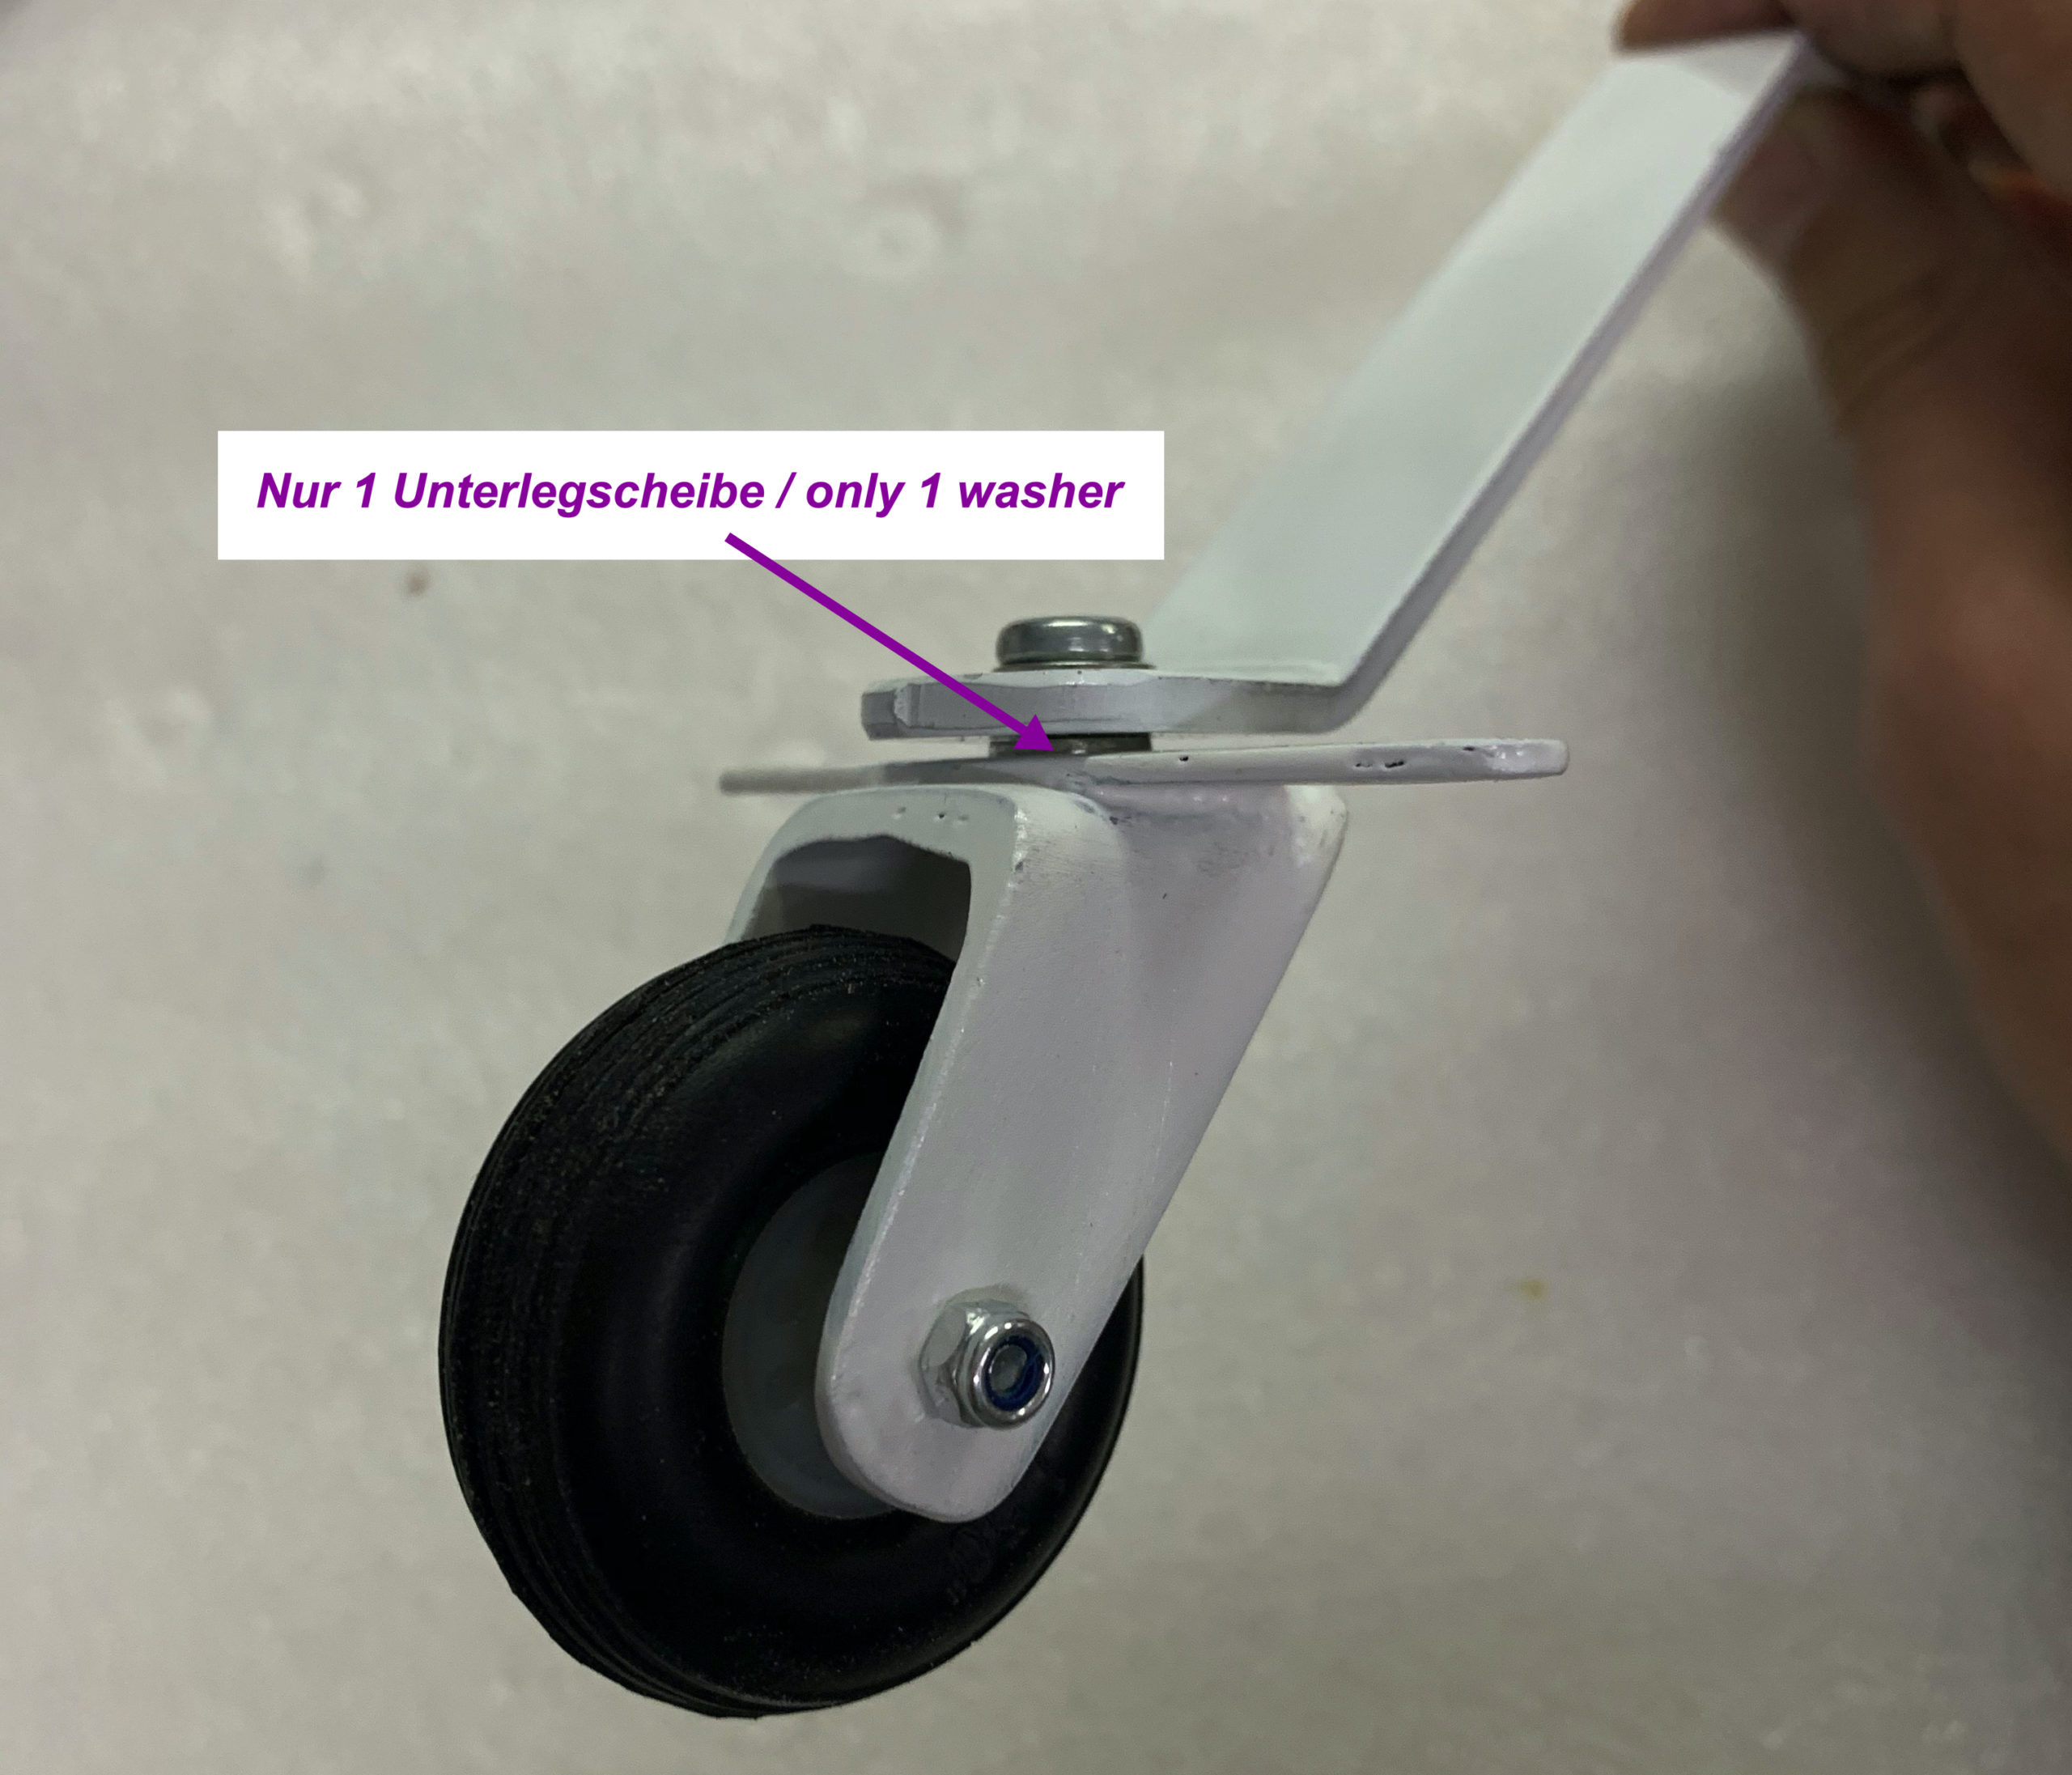
I recommend to modify the tail wheel as shown on the picture. Just one washer and no lock-nut between the bracket  and the wheel.

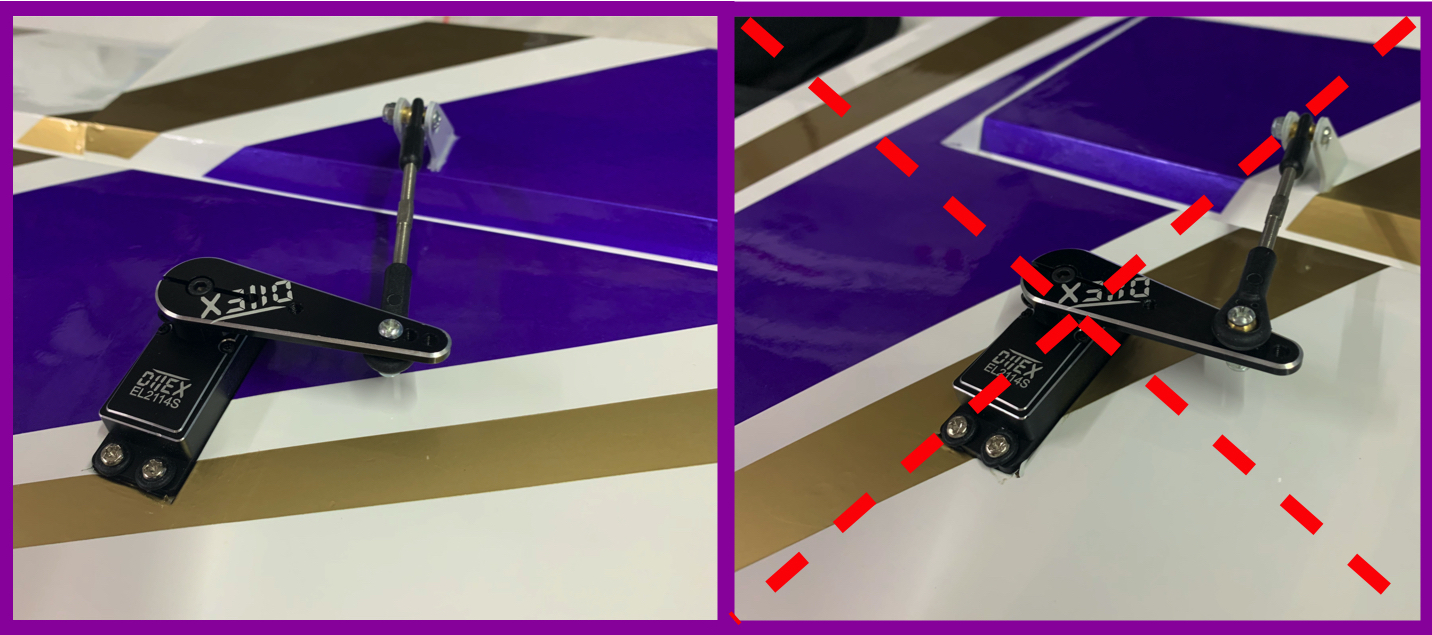
If you use long servo arms, it is useful to install the ball link below the servo arm. Otherwise the ball-linkage will touch the servoarm if you have big deflections.


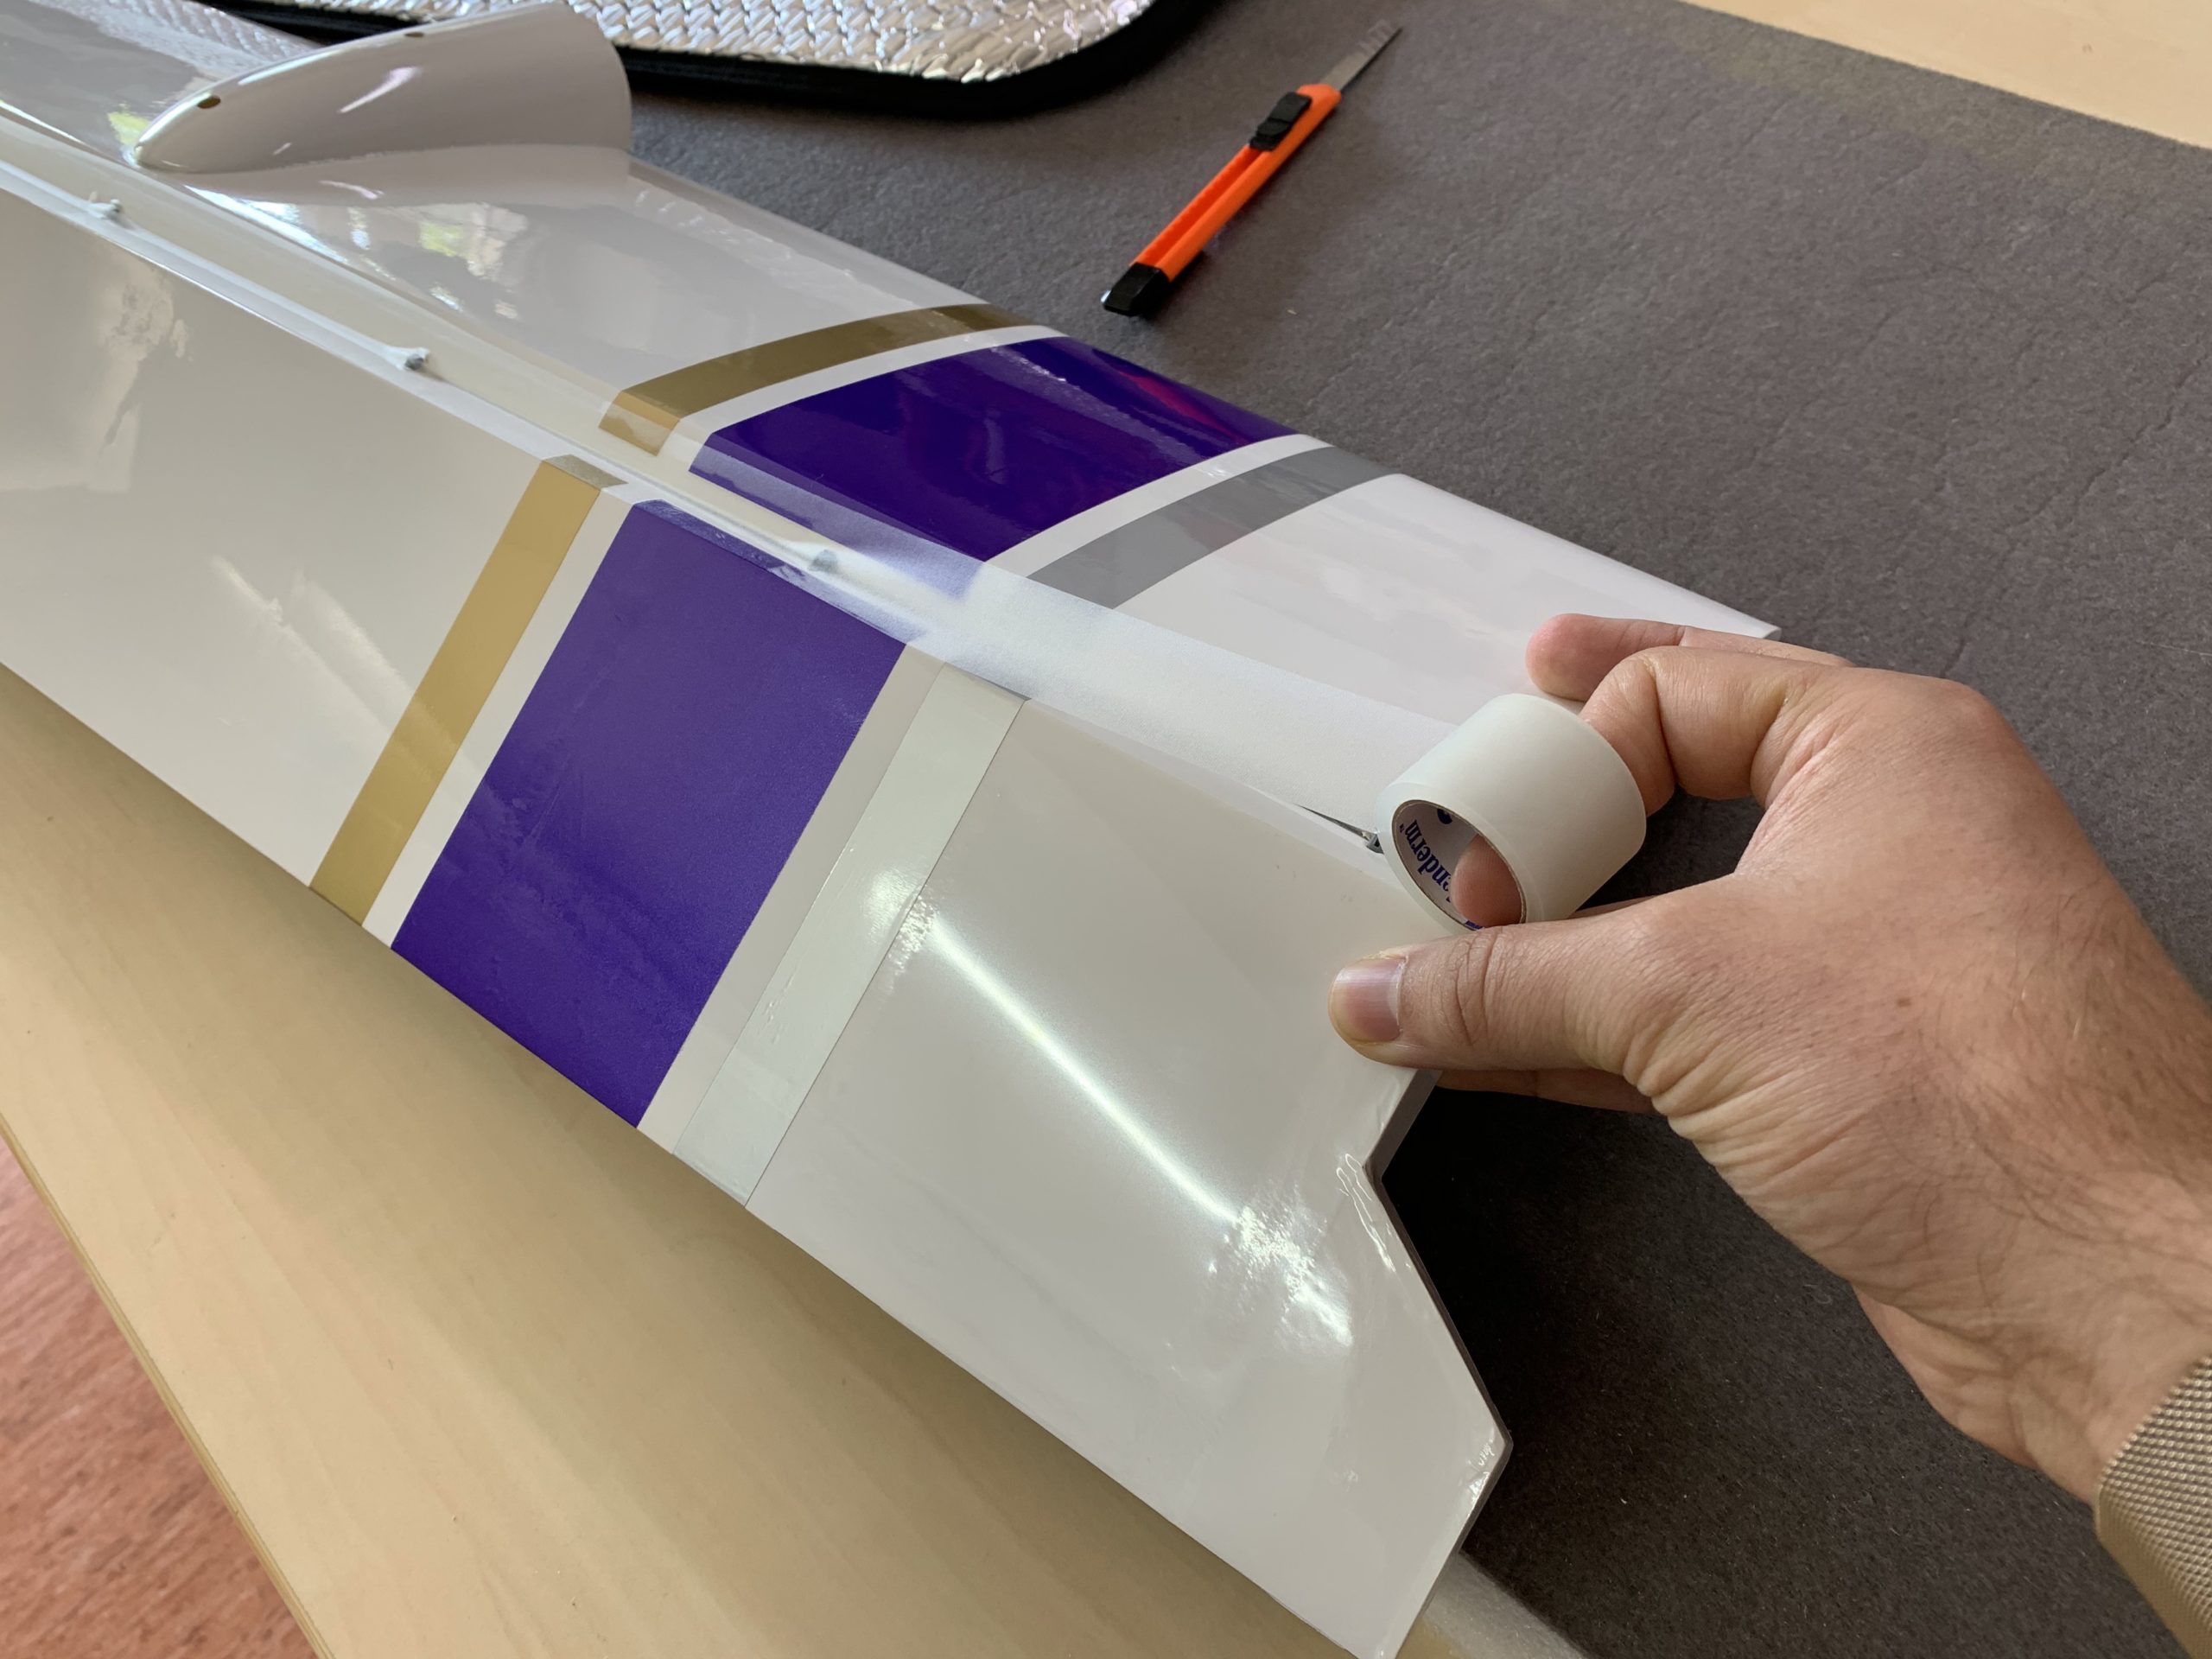
I recommend to tape all control surfaces with flexible, transparent surgical tape.
The result is a much better effect of those functions.

Acrostar mk2 Testberichte

Kurz vor Jahresende sind zwei tolle mehrseitige Testberichte vom Acrostar mk 2 in deutschen Fachzeitschriften erschienen.
Ralph Müller hat den Acrostar für die FlugModell Ausgabe 02/2019 getestet, Nils Brückner für den Branchenprimus FMT Ausgabe 01/2019.
Beide Autoren berichten ausführlich über den Bau, mögliche Modifikationen, aber auch das Original oder die unterschiedlichen Antriebsvarianten.

Beim Test der FlugModell ist mit mir ein kleines Interview zum Acrostar, seine Geschichte und wie es weiter geht, dabei.

Beim Test in der FMT hat Nils Brückner den Cockpitausbau näher beschrieben und sogar über die FMT einen PDF-Plan zur Verfügung gestellt, den Link zur FMT-Website gibt es hier!

Beide Testberichte sind absolut lesenswert- vielen Dank euch Beiden!

Nun danke ich allen Besuchern meiner Website und wünsche einen guten Rutsch und alles Gute für 2019!

Robin Trumpp

Tolles Bild von einem stolzen Acrostar Pilot: Bendix Bode